HR Dashboard
The people-data view that supports cash advances — confirm who is eligible, keep reporting lines current so requests route correctly, and handle eligibility exceptions.
1Accessing your dashboard
Before you can manage employee eligibility and reporting lines, you need an approved account. Sign up once, wait for the administrator to activate your credentials, then log in to reach your HR dashboard.
-
Sign up
Enter your preferred login credentials and select the role
HR.Username requirement Your username must follow the First Name (space) Last Name format — for example,Juan Dela Cruz.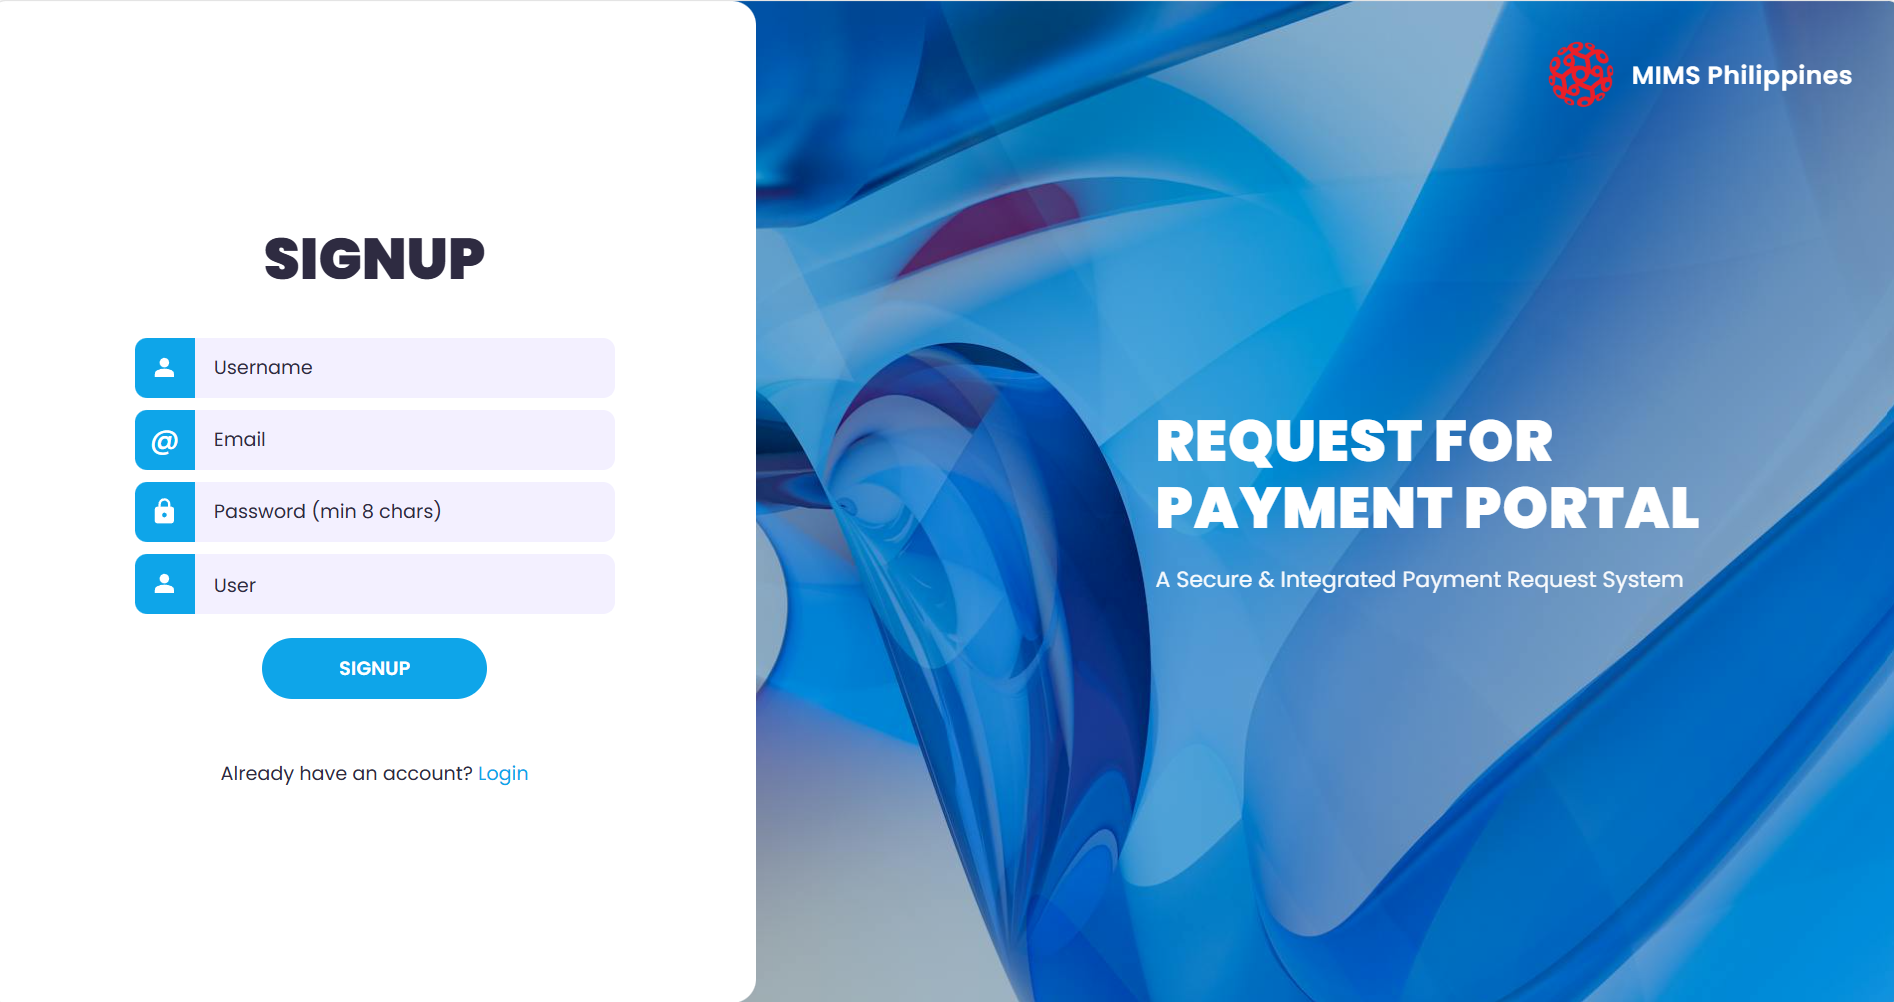
The sign-up screen — enter your credentials and choose the HR role. - Wait for approval Wait for the admin notice confirming that your log-in credentials have been approved.
-
Log in
Enter your registered username and password, then click the
Log Inbutton to access your dashboard.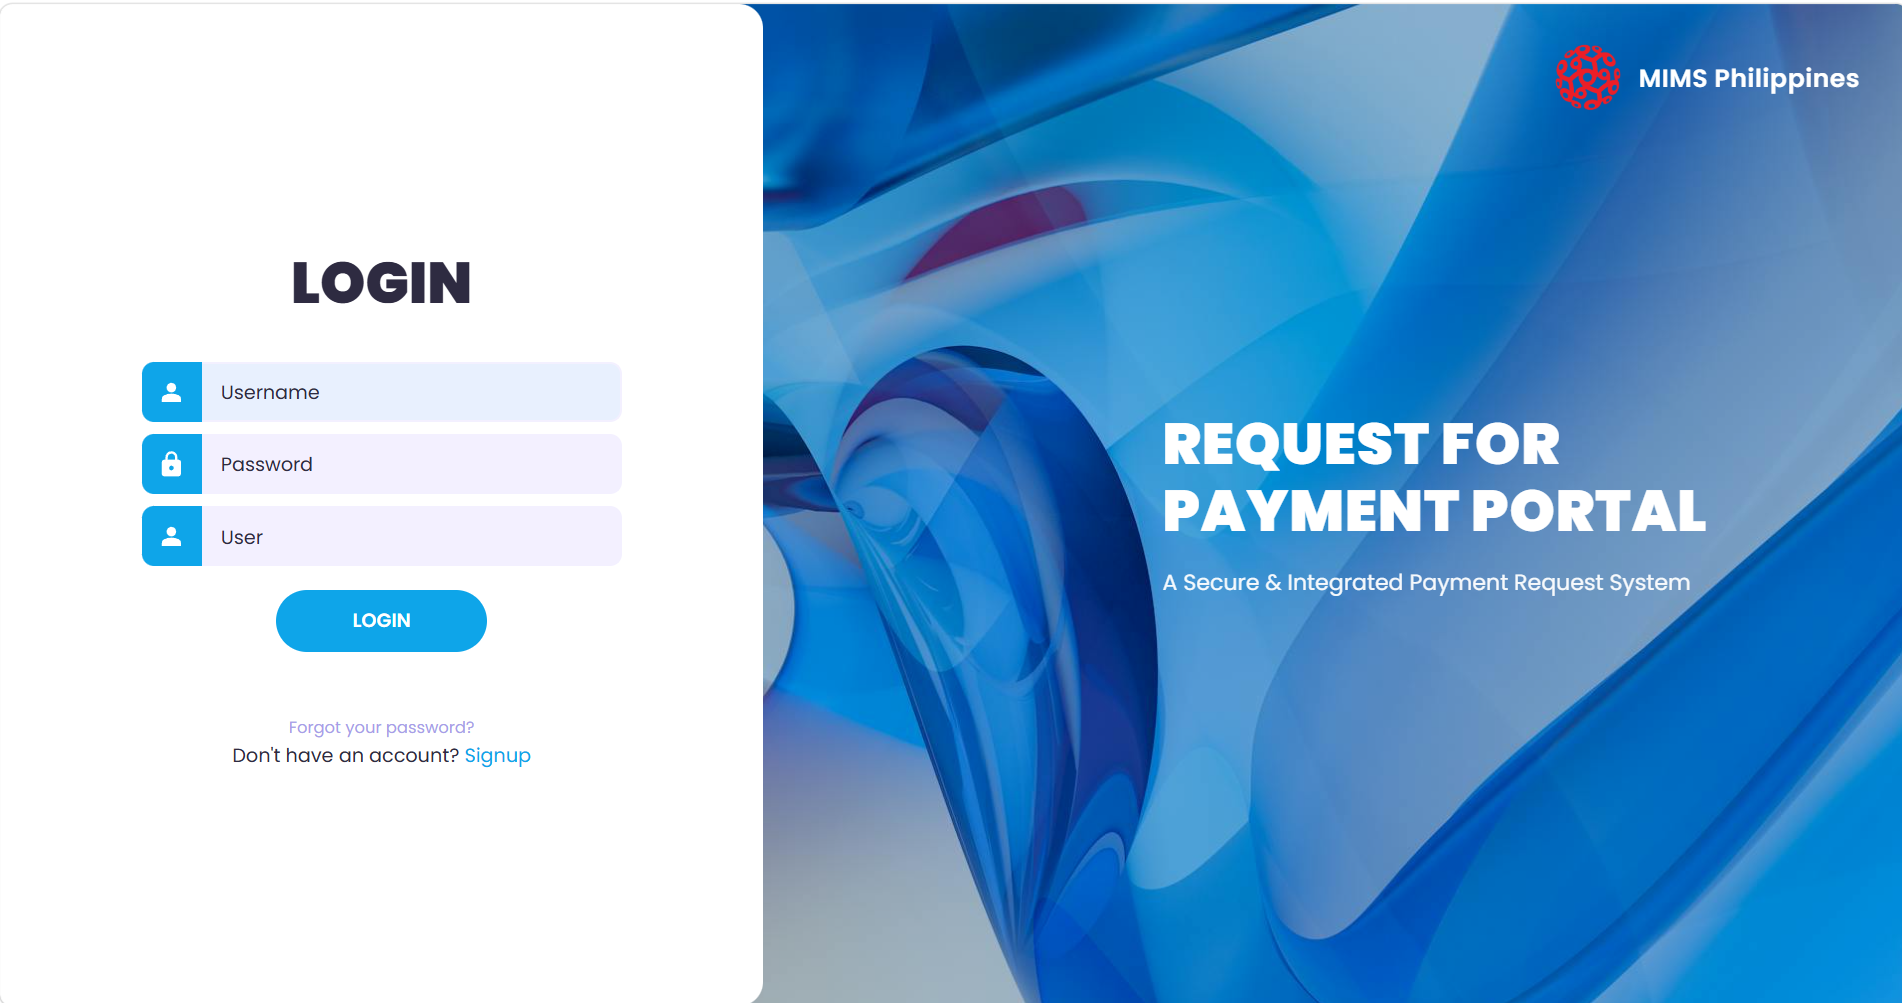
The log-in screen — enter your registered username and password.
2What you'll see
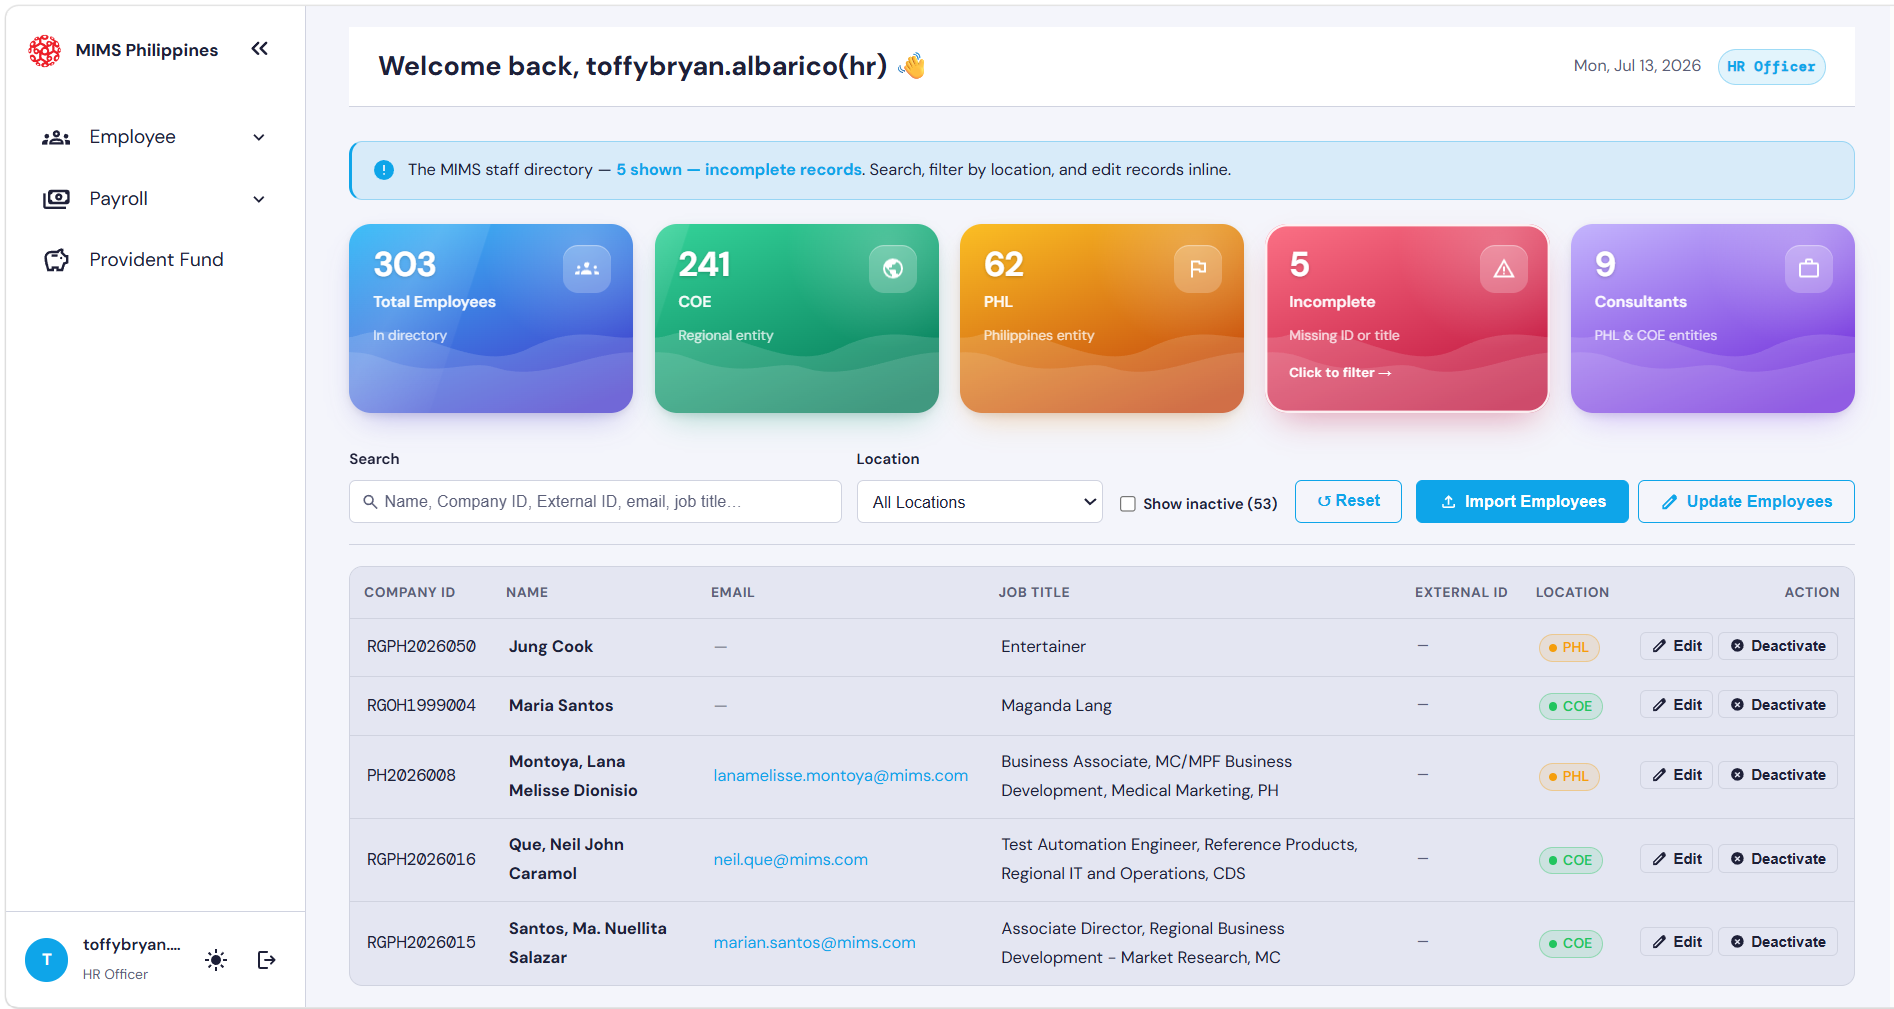
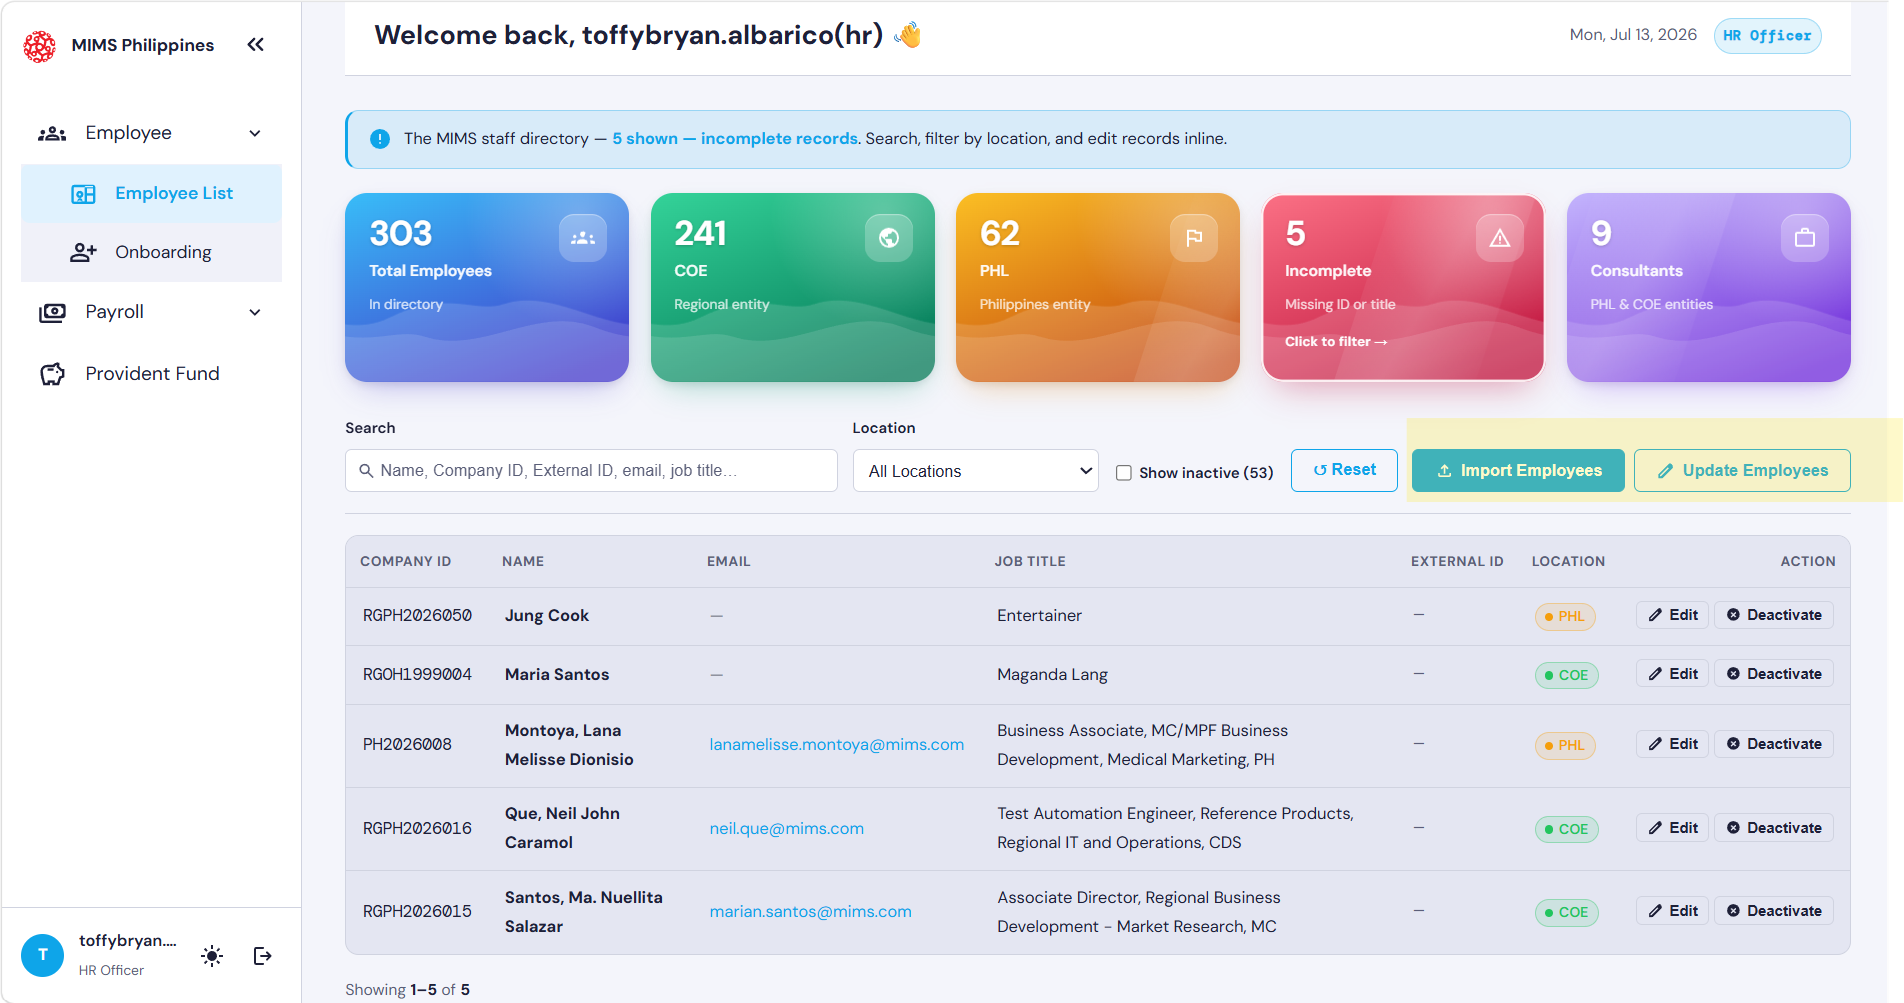
Status tiles summarise the people data behind cash advances — each filtered and categorised into its own entity based on the HR Employee Directory.
- Total Employees — the total number of employees in the directory.
- COE — the total number of RG employees in the directory.
- PHL — the total number of PH Local employees in the directory.
- Incomplete — the total number of employees with a missing ID or job title.
- Consultants — the total number of consultants.
3Onboarding new employees
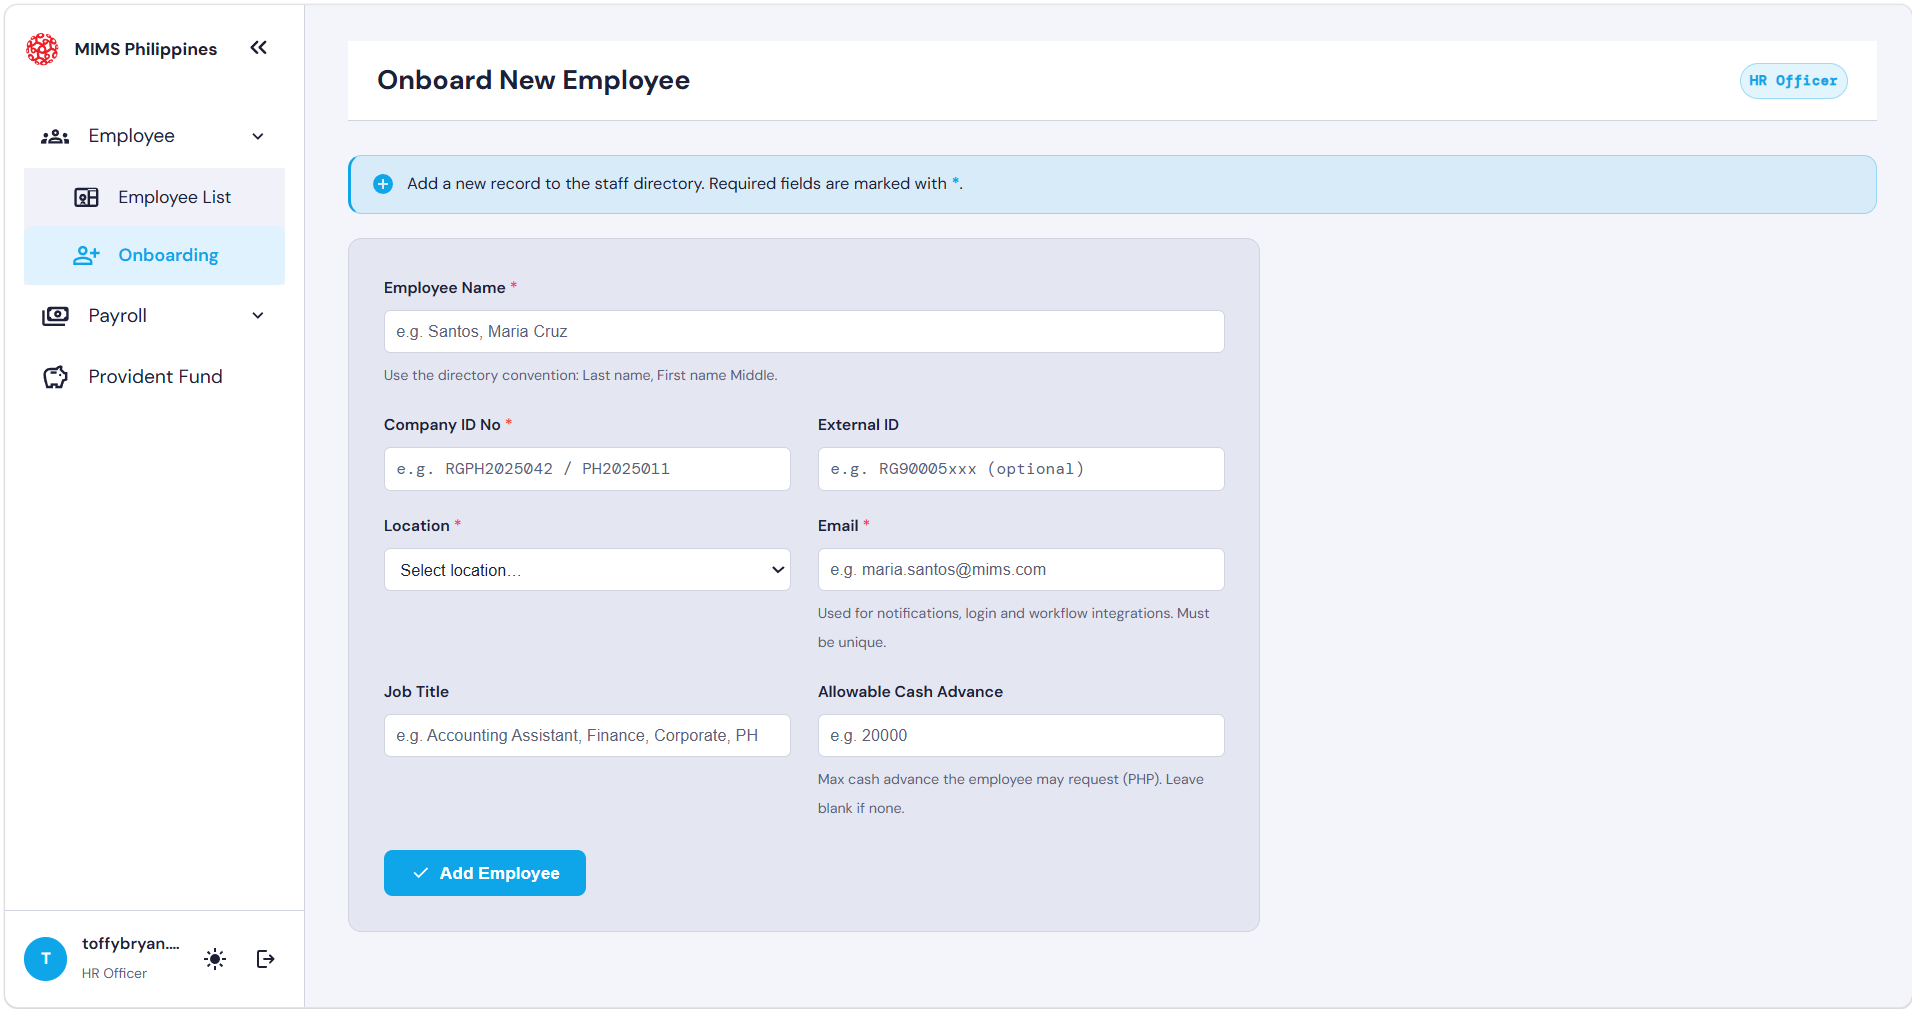
The Onboarding module is used by HR personnel to create and register new employees in the MIMS Philippines system. This process adds the employee to the staff directory and enables their system access in the portal, along with Cash Advance privileges.
3.1Batch import employees
Use this module to onboard multiple employees at once through a single bulk upload, instead of registering them one at a time.
3.2Batch update employees
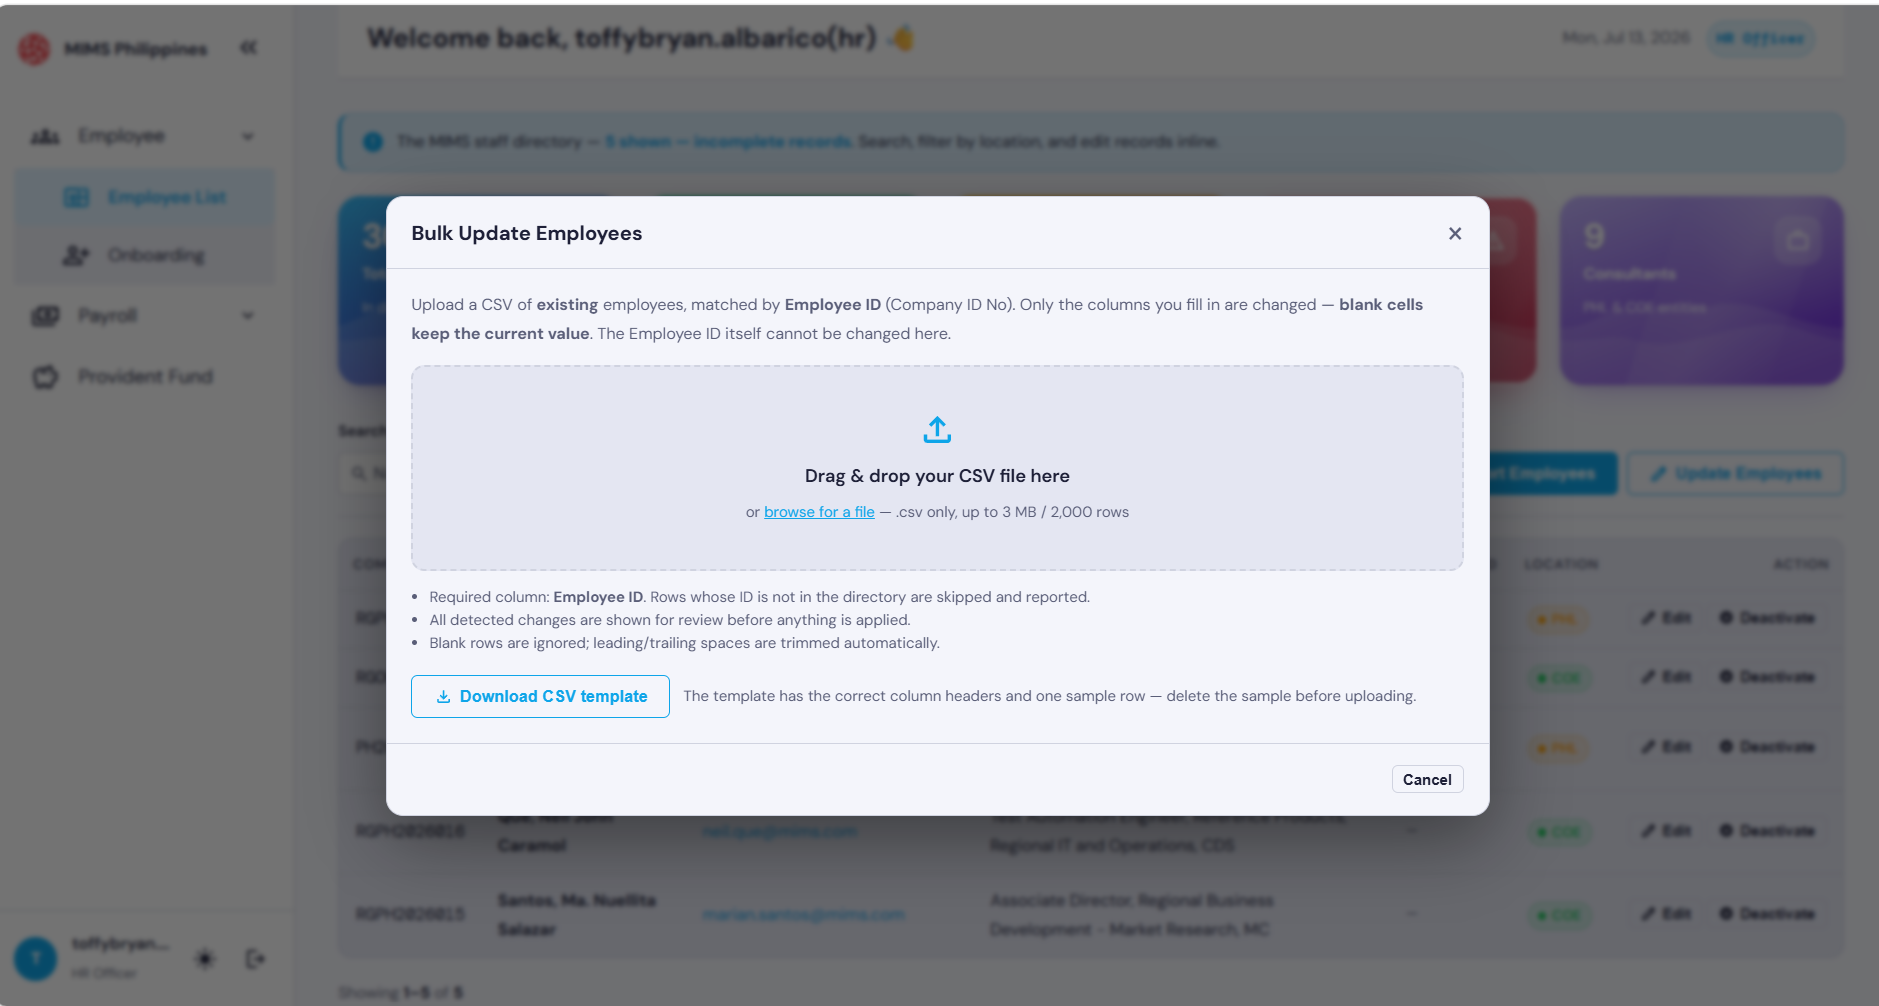
Use this module to bulk-update multiple employees at once through a CSV import file, instead of updating them one by one.
4Deduction
The Deduction module is where Payroll reviews and processes the salary deductions that arise from cash advances. It lets you validate outstanding balances, filter records by payroll cutoff, and include each deduction in payroll processing.
-
Open the Deduction module
From the navigation, go to
Payroll › For Deduction.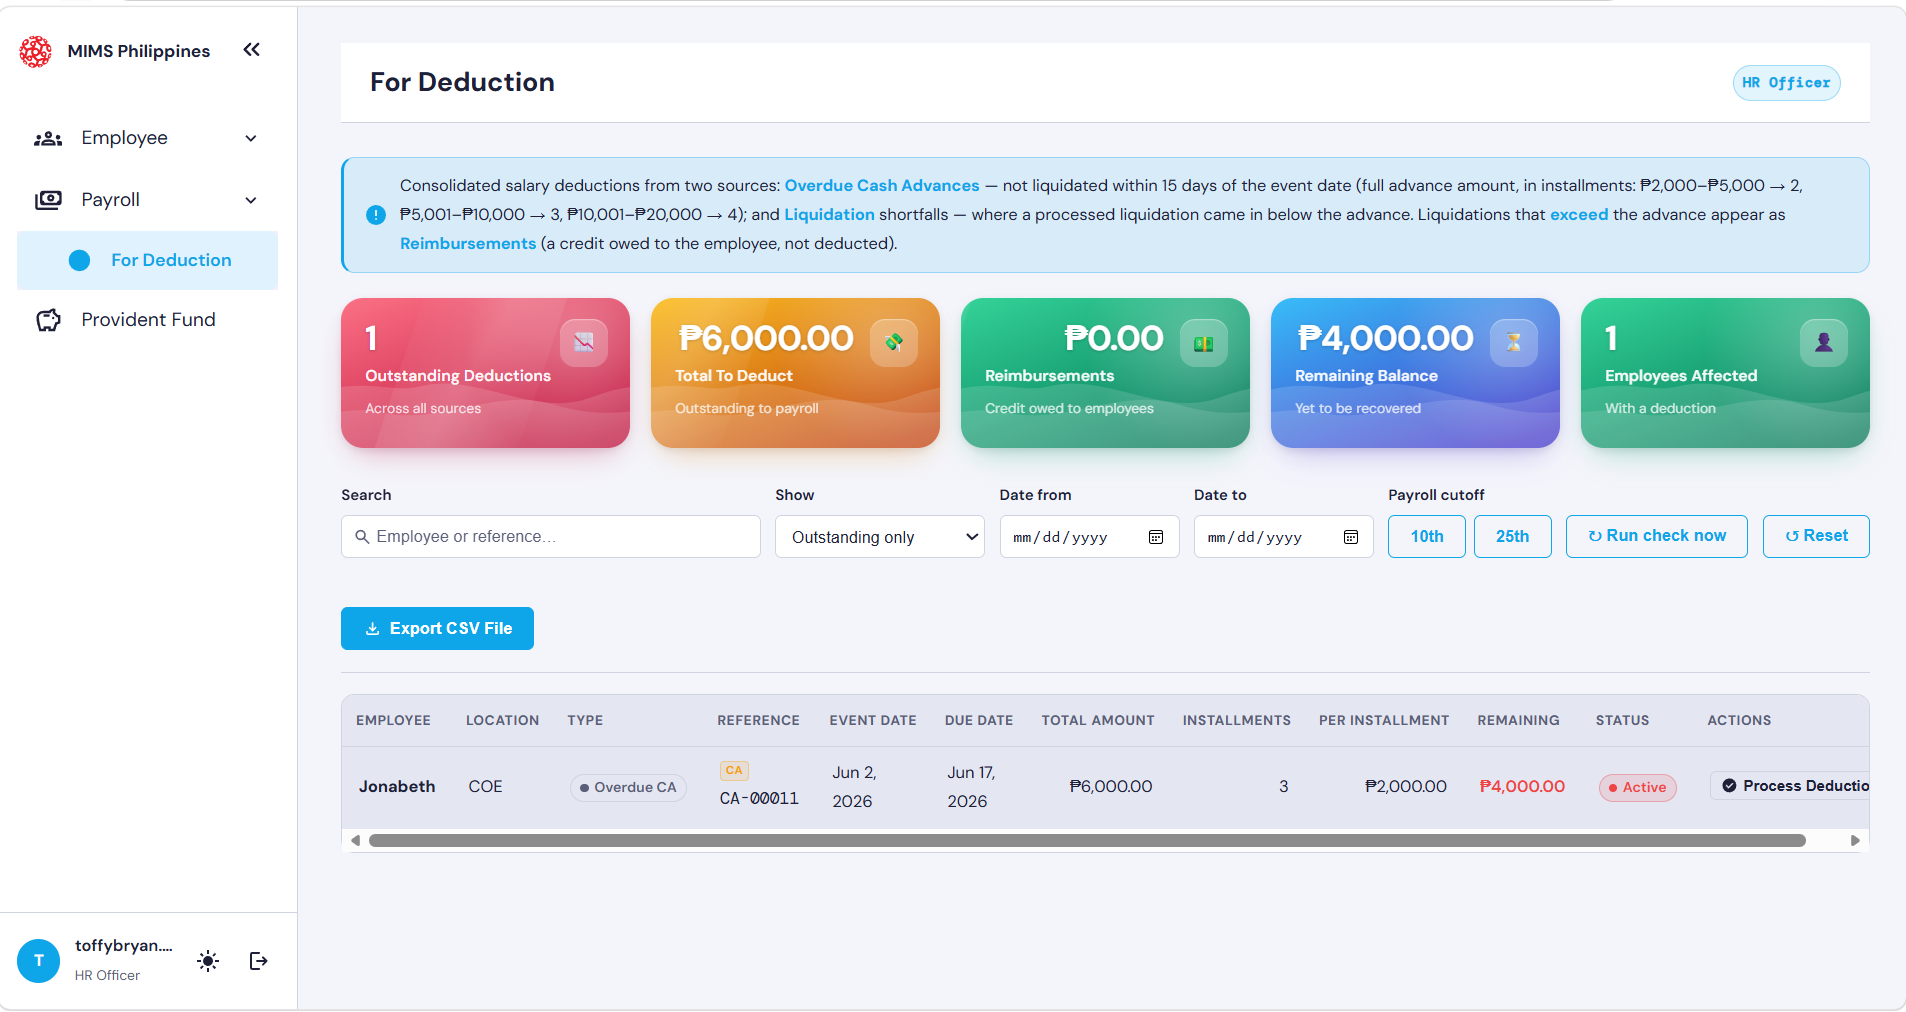
The Deduction module — dashboard summary and deduction records. -
Review the dashboard summary
The summary tiles give you the overall deduction picture at a glance:
- Outstanding Deductions
- Total to Deduct
- Reimbursements
- Remaining Balance
- Employees Affected
- Search for a record Use the Search field to find an employee or reference number.
-
Filter the records
Narrow the list using the available filters:
- Status — e.g. Outstanding Only.
- Date From / Date To — limit records to a date range.
- Payroll Cutoff — the 10th or 25th.
-
Run a check
Click
Run Check Nowto refresh and validate the deduction records. -
Review the deduction details
Each row in the list describes one deduction:
- Employee Name
- Deduction Type
- Reference Number
- Total Amount
- Installments
- Remaining Balance
- Status
-
Process a deduction
Click
Process Deductionunder Actions to include the deduction in payroll processing. -
Export the report
Use
Export CSV Fileto download the deduction report. -
Reset the view
Click
Resetto clear all filters and return to the default view.
Deductions are generated from overdue cash advances and liquidation shortfalls. Reimbursements are recorded as credits owed to employees and are not deducted.