Approver Dashboard
Your decision queue for the Cash Advance Portal — review requests routed to you, act on them quickly, and keep an eye on your approval turnaround.
1Accessing your dashboard
The Request Approval Dashboard is designed to help approvers monitor, review, and manage requests submitted within the system. It provides a quick summary of request statuses, notifications, and actionable items requiring approval.
Before you can review and approve requests, you need an approved account. Sign up once, wait for the administrator to activate your credentials, then log in to reach your Approver dashboard.
-
Sign up
Enter your preferred login credentials and select the role
APPROVER.Username requirement Your username must follow the First Name (space) Last Name format — for example,Juan Dela Cruz.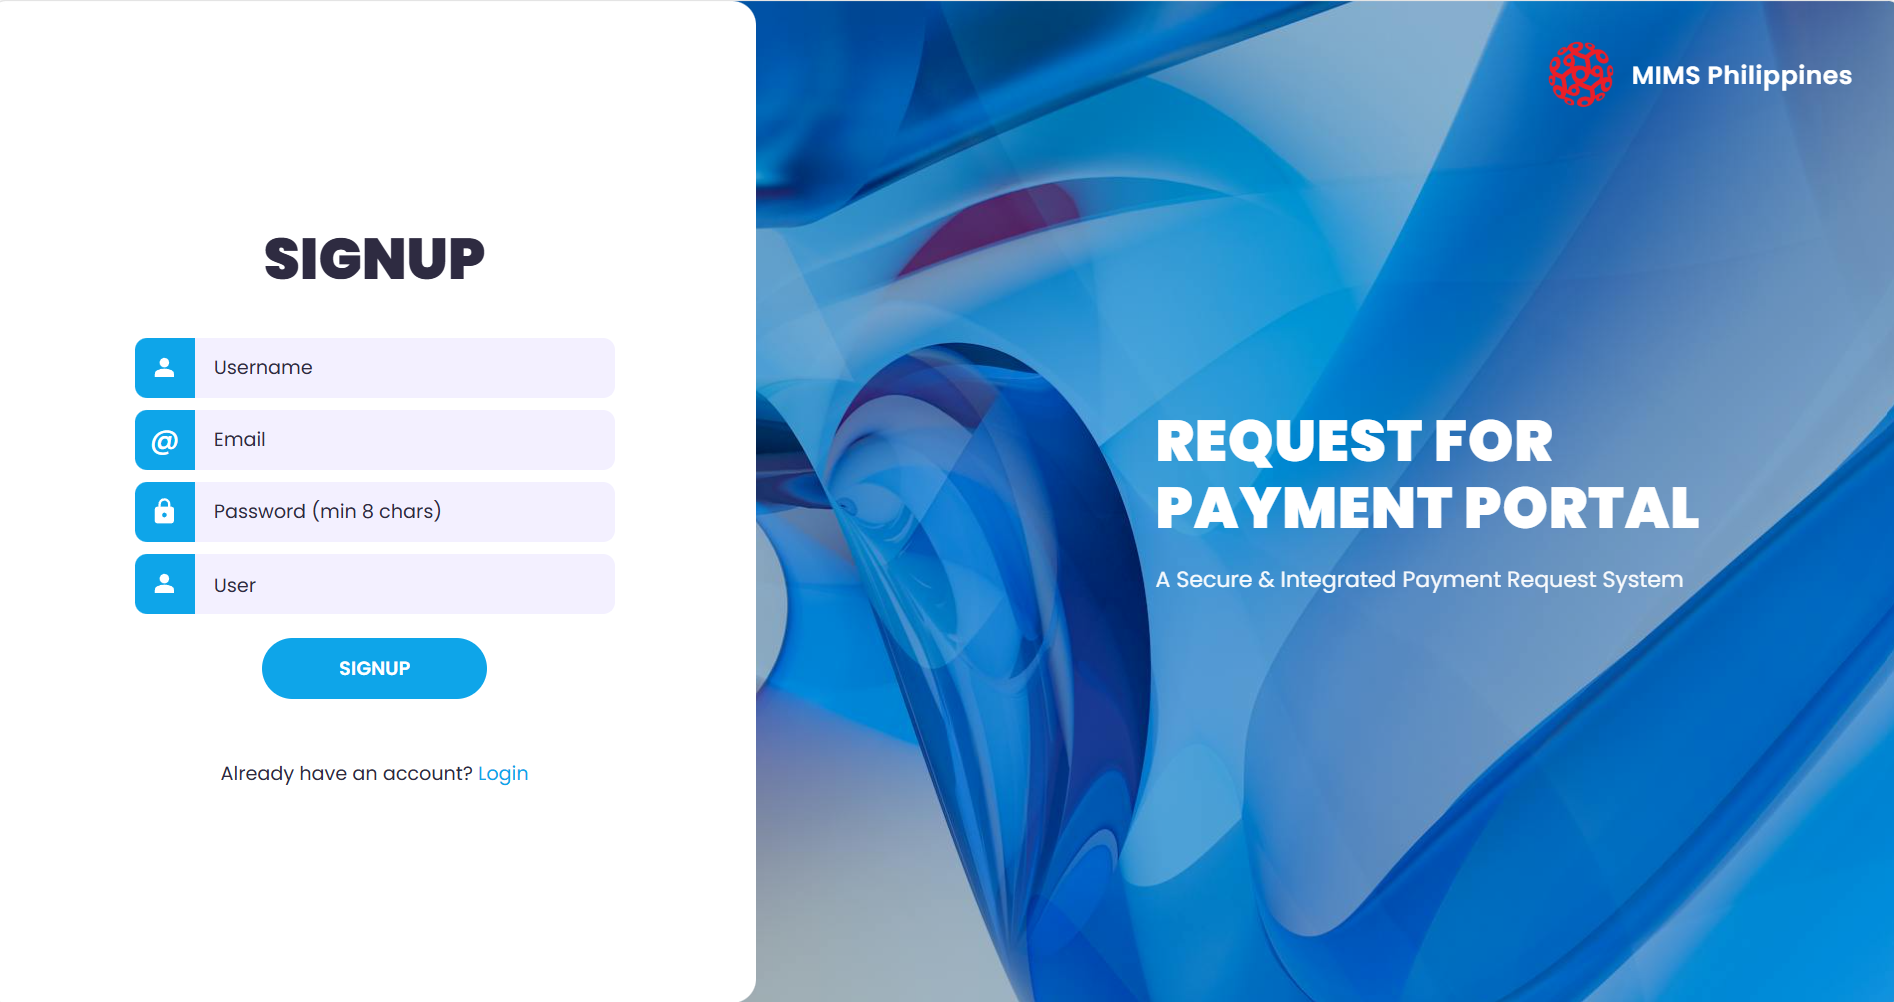
The sign-up screen — enter your credentials and choose the APPROVER role. - Wait for approval Wait for the admin notice confirming that your log-in credentials have been approved.
-
Log in
Enter your registered username and password, then click the
Log Inbutton to access your dashboard.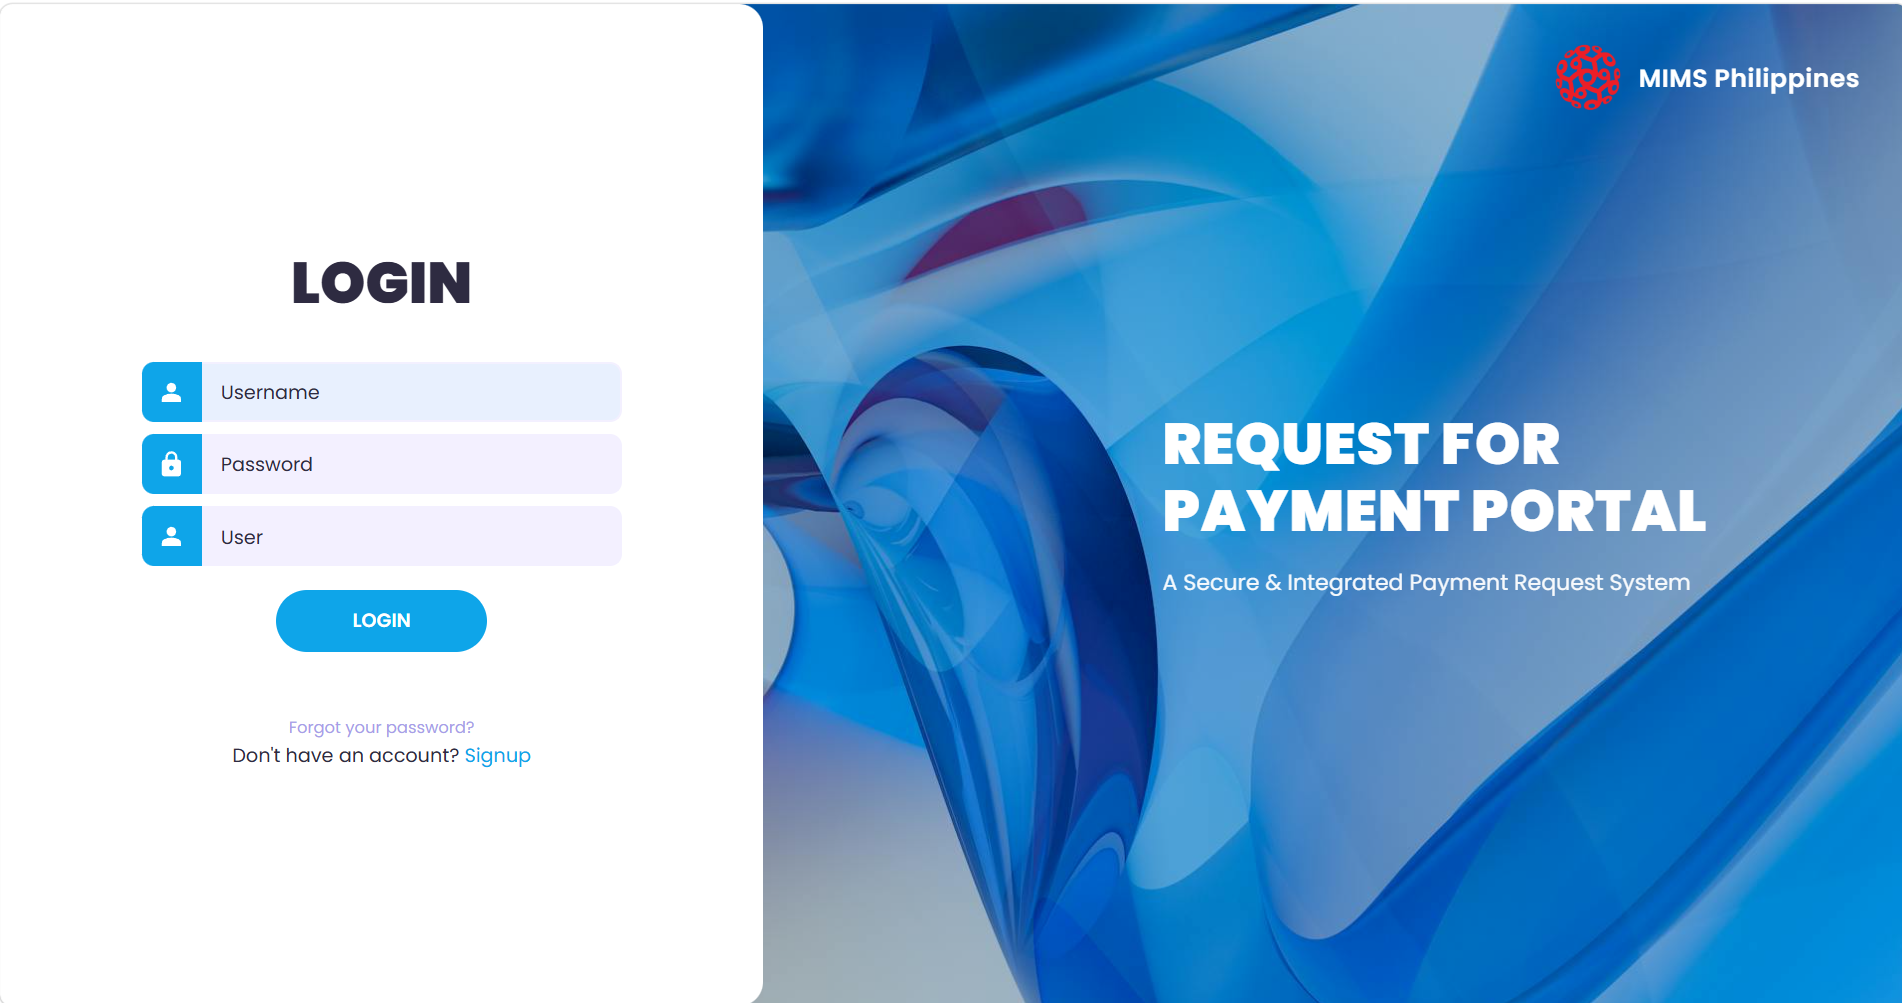
The log-in screen — enter your registered username and password.
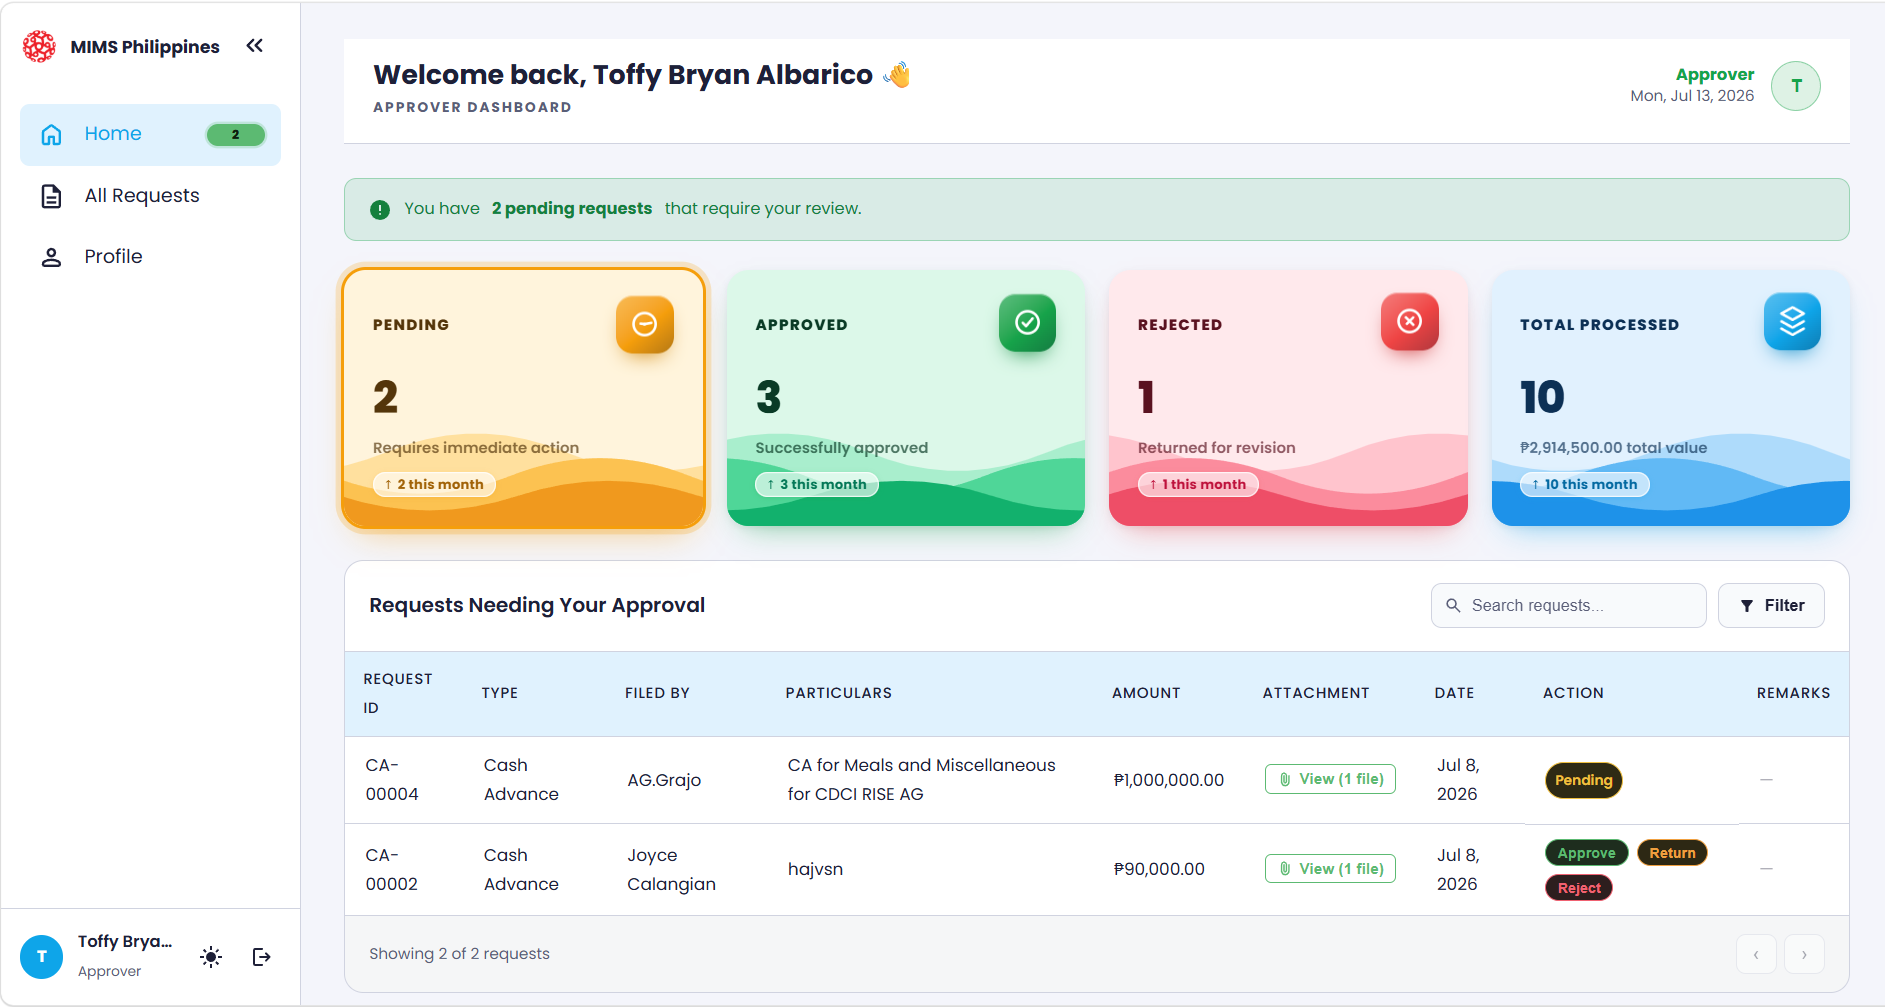
Once you log in, your dashboard opens. The navigation panel on the left lets you move through the system, while the main area summarises the requests waiting on your decision.
2Dashboard overview
After logging in, you will see your personalized dashboard. The dashboard contains:
- A welcome message displaying your name
- Your user role (e.g., Approver)
- A notification banner for pending requests
- Summary cards showing request status
2.1Left Navigation Panel
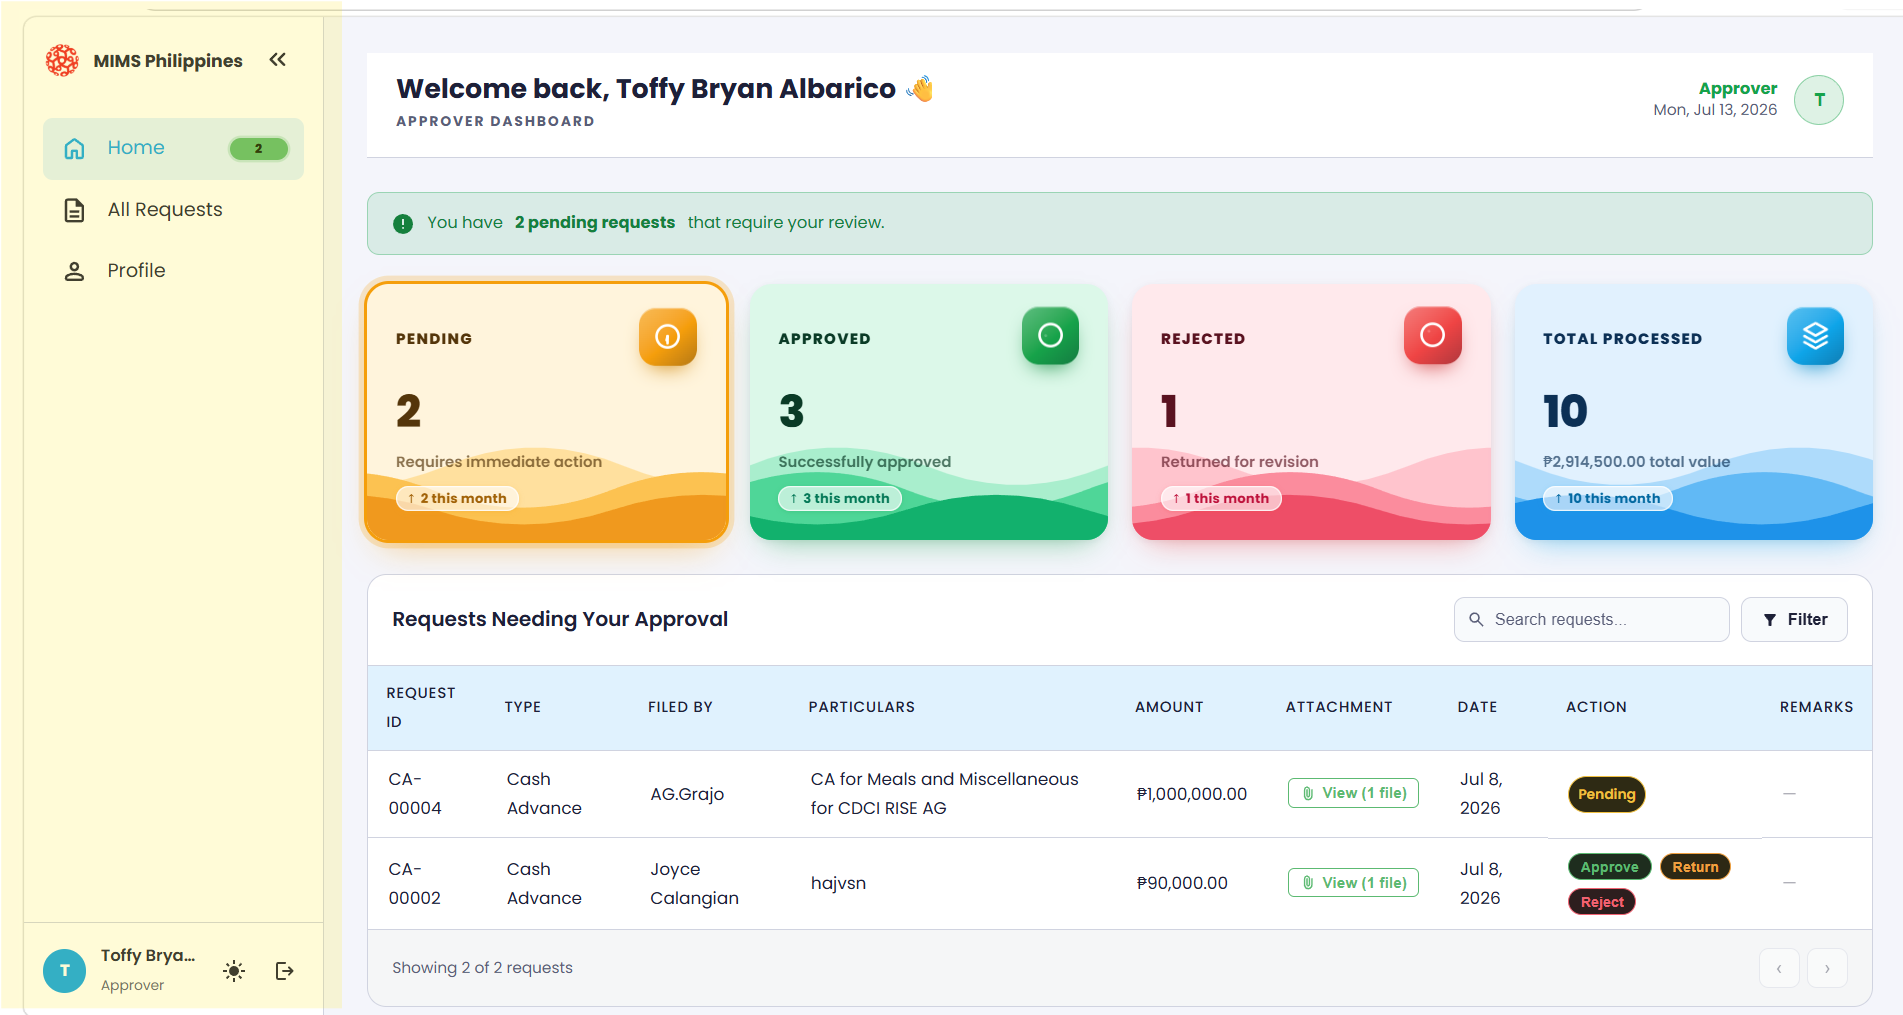
The navigation panel on the left lets you move between the main areas of the portal:
- Home — default landing page with the dashboard summary.
- All Requests — displays the complete list of submitted requests.
- Profile — access user account settings and personal information.
2.1.1Home
Home is your default landing page. It lists every request routed to you in a table — each row is one request, and the columns describe it:
- Request ID — the unique reference for the request, prefixed by type. For example,
CA-00004orLIQ-00002. - Type — either Cash Advance or Liquidation.
- Filed By — who submitted the request.
- Particulars — the description or purpose of the request.
- Amount — the monetary value of the request (e.g.,
₱10,000.00). - Attachment — supporting documents. Click View (1 file) to open them.
- Date — the submission or approval date.
- Status — the current state of the request, e.g. Approved.
- Remarks — notes such as “Approved”, or left blank.
CA = Cash Advance · LIQ = Liquidation
2.1.2All Requests Page
The All Requests page displays a centralized list of every submitted request — both Cash Advances and Liquidations. As an approver, this is where you view, filter, and monitor request statuses, and open supporting documents.
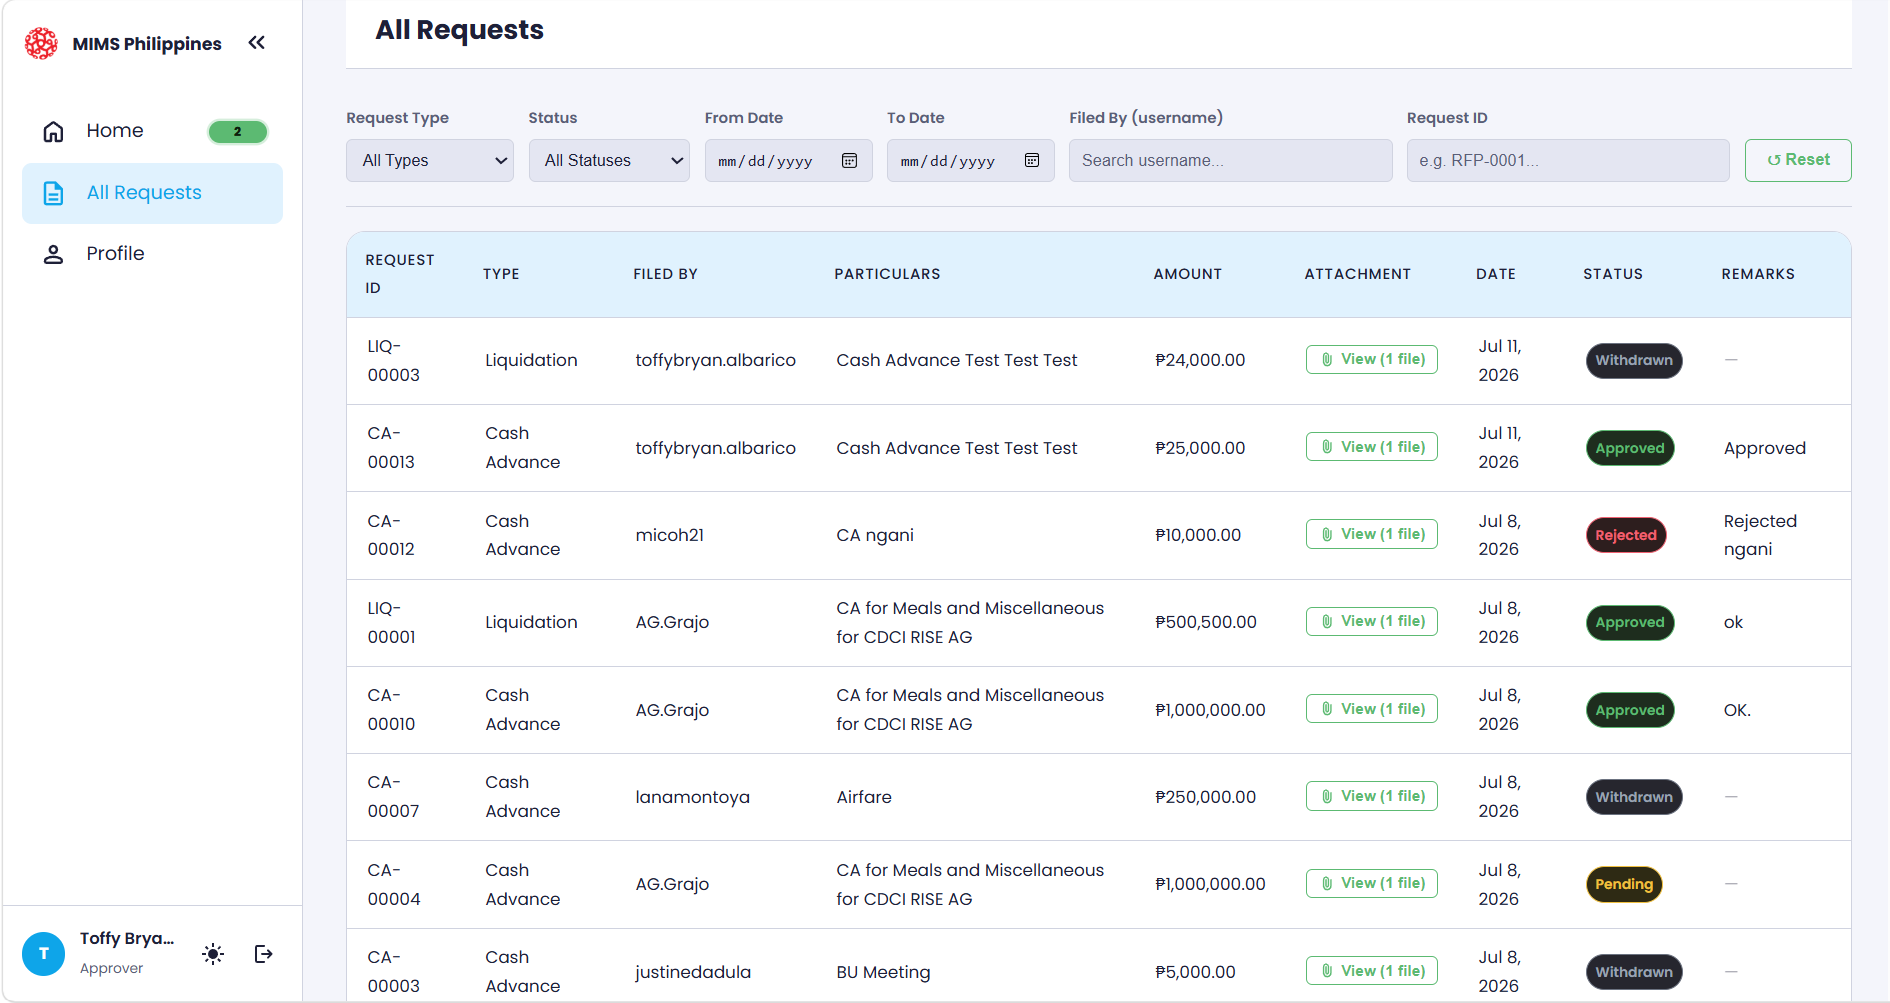
The filter bar at the top lets you refine the list of requests:
- Request Type — filter by type (e.g., Cash Advance, Liquidation, or All Types).
- Status — filter by request status (e.g., Approved, Pending).
- From Date / To Date — select a date range to view requests within a specific period.
- Filed By (username) — search requests by the submitter’s username.
- Request ID — search for a specific request (e.g.,
RFP-0001). - Reset — clears all filters and restores the full list.
Each row in the requests table is one request, described by these columns:
- Request ID — the unique identifier for each request (e.g.,
CA-00004,LIQ-00002). - Type — the request category (e.g., Cash Advance, Liquidation).
- Filed By — the username of the person who submitted the request.
- Particulars — the description or purpose of the request (e.g., project details, usage).
- Amount — the total amount requested or liquidated (e.g.,
₱10,000.00). - Attachment — whether supporting documents are attached. Click View (1 file) to open the uploaded file(s).
- Date — the date the request was filed.
- Status — the current state of the request, e.g. Approved.
- Remarks — additional comments or approval notes.
The Status column uses colour-coded badges so you can scan the queue at a glance:
- Approved — the request has been reviewed and approved.
- Pending — the request is still awaiting a decision.
- Rejected — the request was declined and will not proceed.
- For Review — the request is being reviewed before a decision.
2.1.3My Profile Page
The My Profile page lets you view your personal account details and manage the approval signature that appears when you sign off on requests.
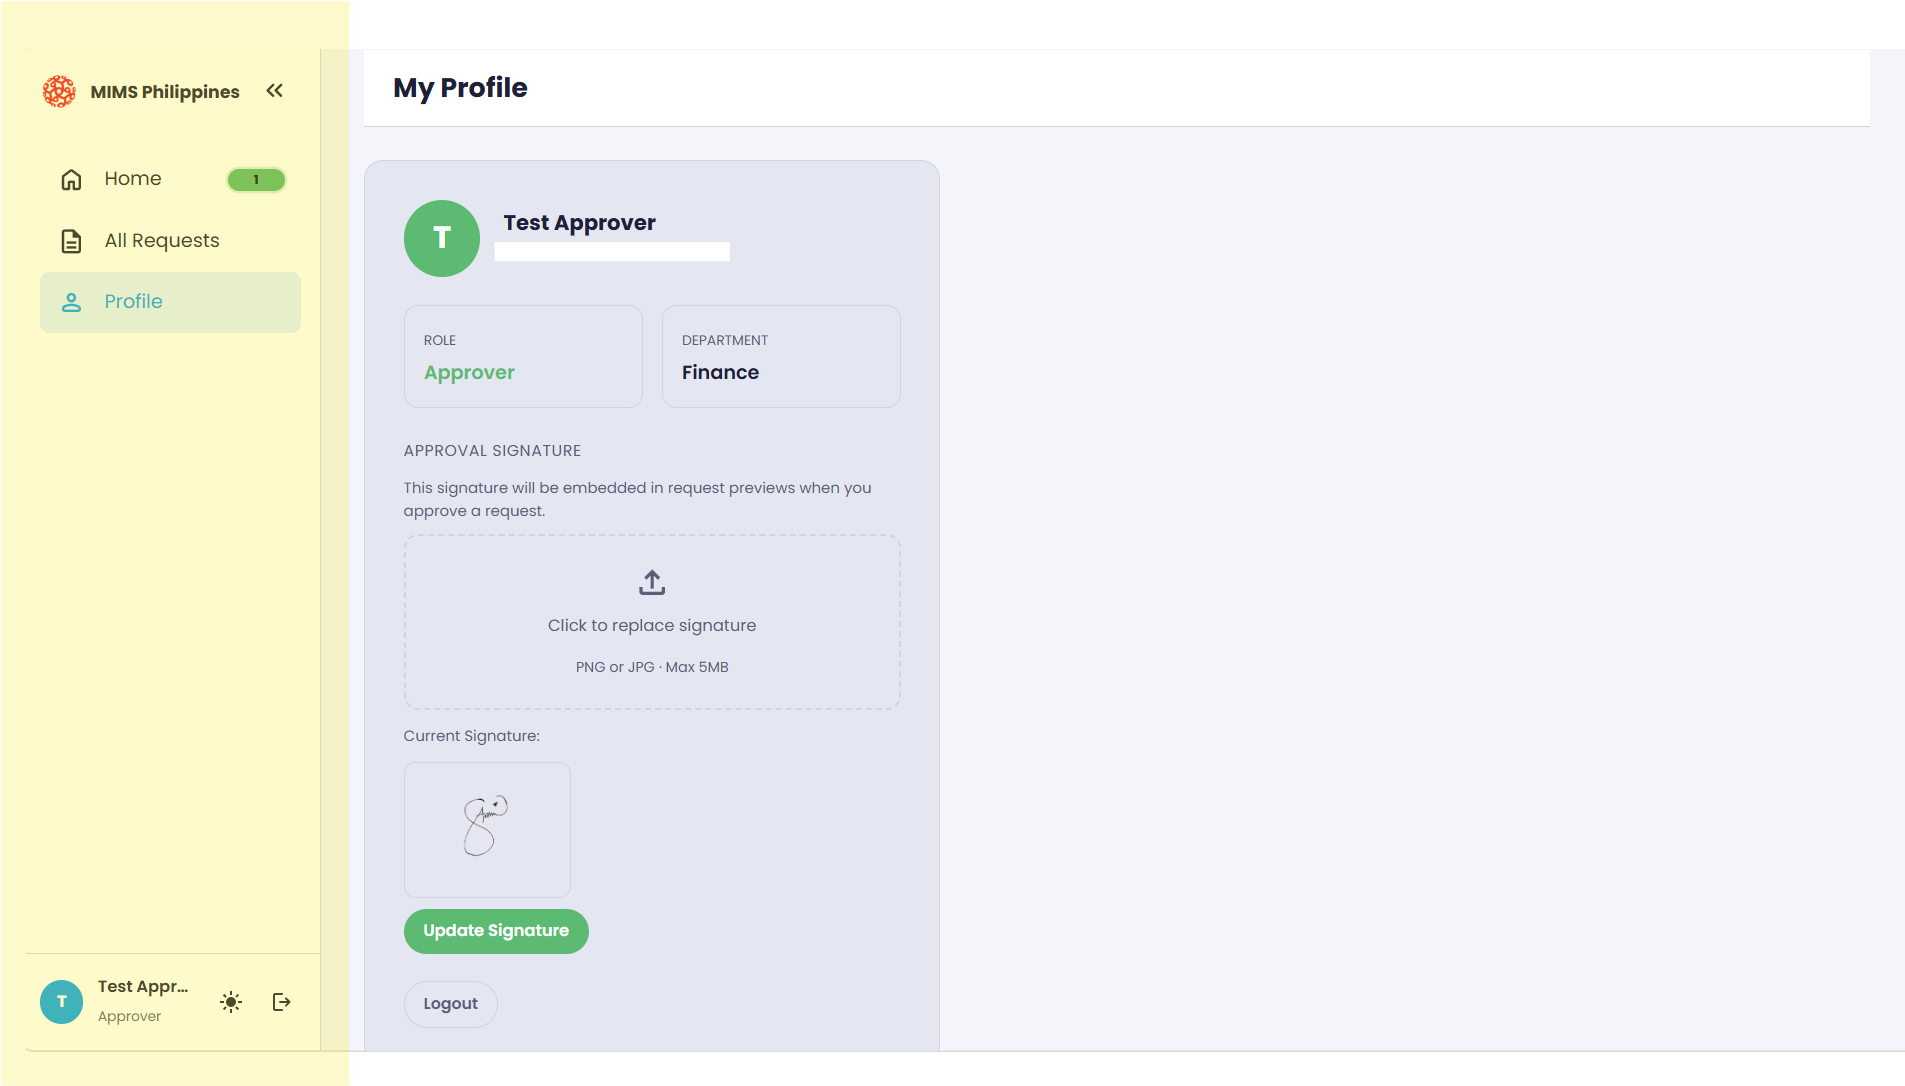
At the top of the page, your profile details are displayed:
- Profile Initial Icon — a circular avatar showing your initial.
- Full Name — your registered user name.
- Email Address — the official email linked to your account.
Below the header, two details cards summarise your access:
- Role — your level of access (e.g., Approver).
- Department — your assigned department (e.g., Finance).
Approval Signature. This section lets you upload and manage the signature used for approvals. Once saved, your signature automatically appears in request previews when you approve requests.
- Upload signature — click the upload box labeled
Click to replace signatureand choose your file. - Current signature — displays the signature image currently saved to your account.
- Update Signature — click
Update Signatureto save the newly uploaded image.
PNG or JPG · maximum file size 5 MB.
3Approving the requests
When a request is routed to you, you act on it directly from the dashboard. Open the request from your Home table, review the details in the preview, and record your decision.
-
Open the Home page
From the left navigation panel, select Home to return to your dashboard. Every request routed to you is listed in the request table on this page.
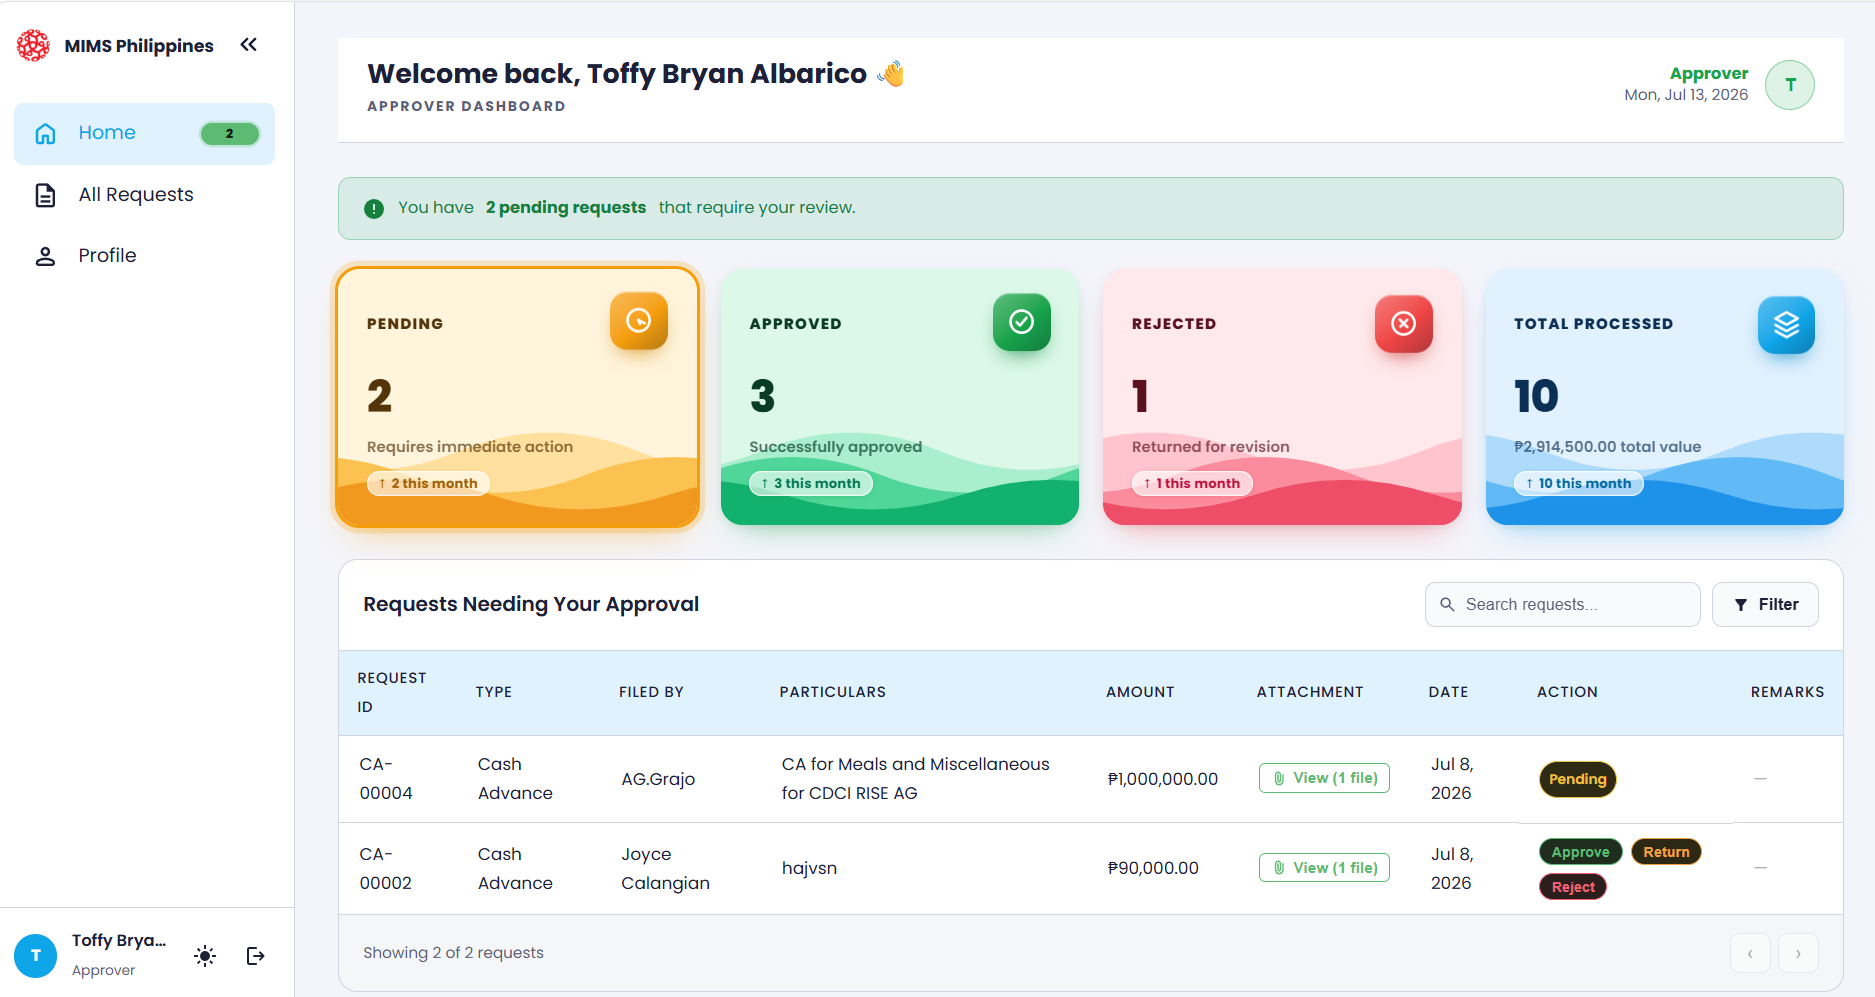
The Home page — your queue of requests to review. -
Open a request
In the request table, click any request row to open it. A preview modal pops up with the full details of the selected request and an approval progress bar in the right side of the modal.
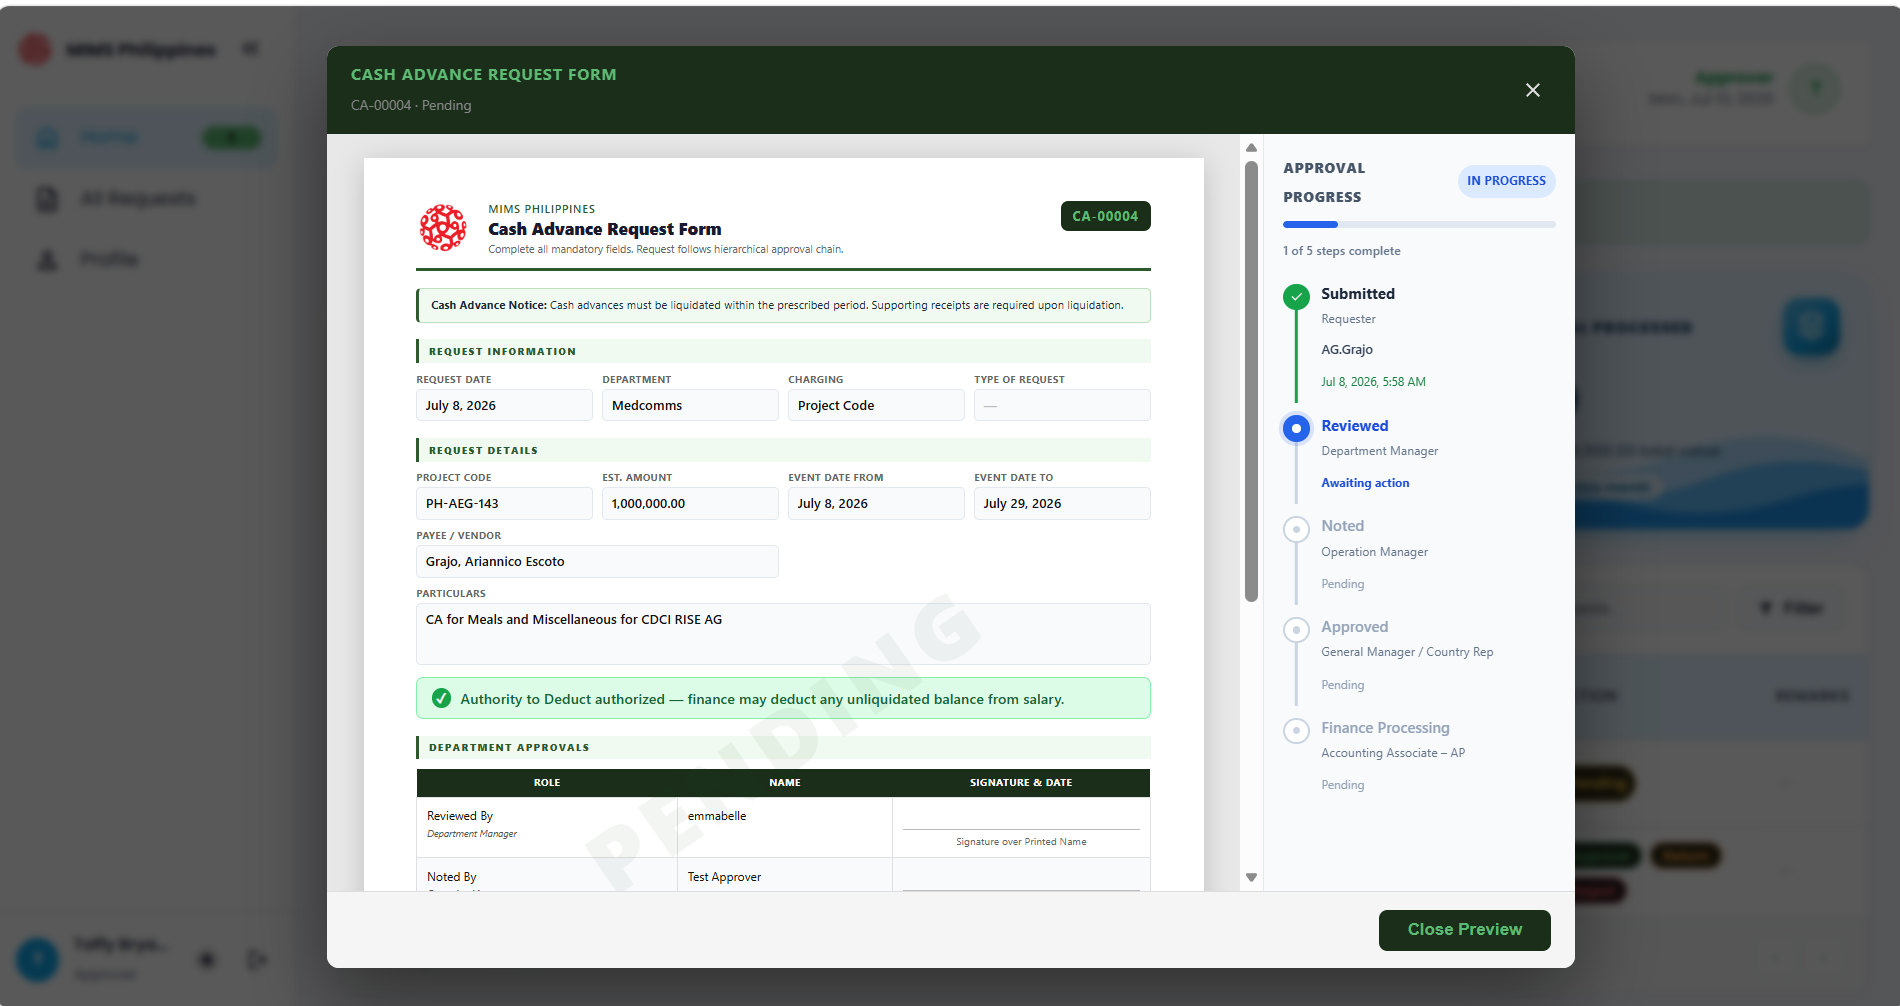
The preview modal — the full details of the selected request. -
Click the action button
Review the request details carefully, then record your decision using one of the action buttons:
- If all information is accurate and reasonable, click Approve.
- If the request contains incorrect, invalid, or unreasonable information, click Reject.
- If the request is missing required information or needs further clarification, click Return. The request will be automatically routed back to the requester for revision.
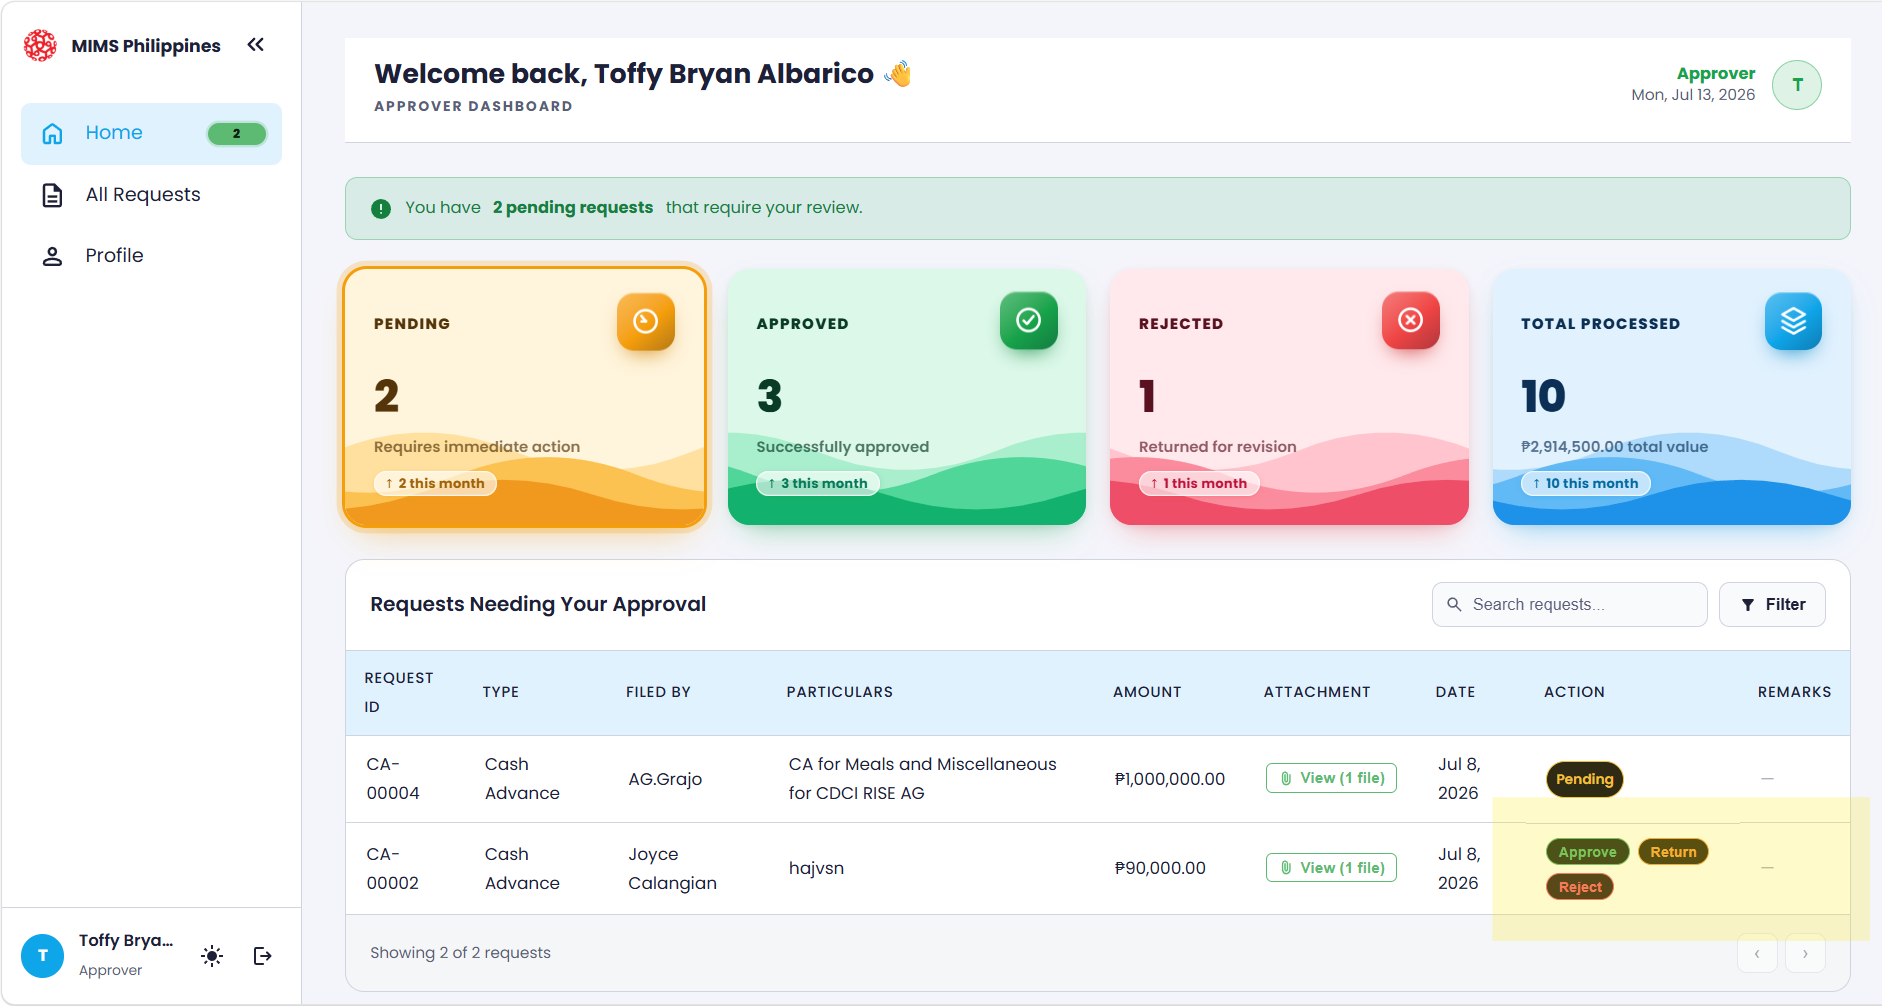
The action buttons — Approve, Reject, and Return.